Most of the application links we’ll be using in this tutorial can be found off of the main AccountExec homepage on the GoDaddy site: http://www.godaddy.com/gdshop/account/exec.asp Assigning an AccountExec is done in 2 parts, an invite is sent to our support team. Then once accepted, you’ll need to assign permissions to allow us to administrate your domains. Let’s look at step 1 first:
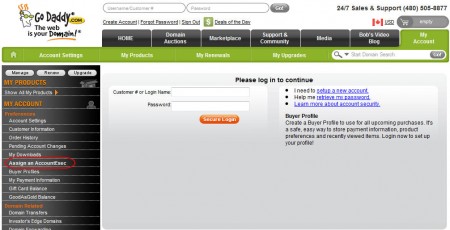
STEP 1.
1. When you get to the site you’ll see on the left hand side of the GoDaddy website a button for Assign an Account Exec. Click this and it will prompt you to login.
2. It will then ask you to enter some information. Enter the following:
a. First Name: WritheM
b. Last Name: Admins
c. Email: admin@writhem.com
d. Confirm it: admin@writhem.com
3. This will send us the invite email which we will accept, and then reply to you. Once you receive confirmation that we have accepted the AccountExec invite you’ll need to proceed to step 2.
STEP 2.
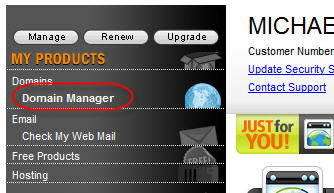
1. Sign in again if needed. Then enter the Domain Manager. The link to this can be found on the left hand menu under My Account.
2. Click on New Folder. We suggest that you enter the Folder name as the WritheM Account name you’ve previously agreed on. This helps us identify your domains from all the other’s we administer. You can give it a description too if you like, but don’t forget to hit OK. A message may warn you about pending changes not reflecting immediately which you can hit OK on as well. Note: We see this name in our screen, so make sure it’s something that identifies you to us.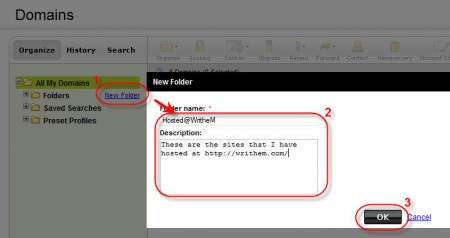
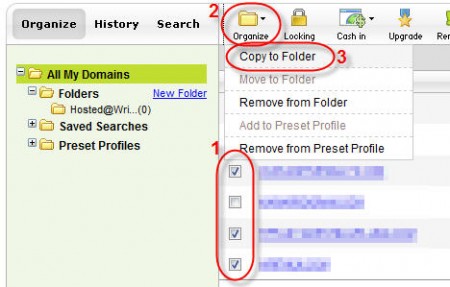
3. Make sure you have the domains that we are hosting for you checked and then click Organize. Under that menu is Copy to Folder, click that.
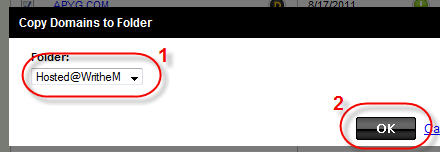
4. Change the drop down to show the folder name that we had earlier. In the example it is Hosted@WritheM, but it should probably be your WritheM Username instead of Hosted.
5. Click on the Parent folder to our created folder called Folders and then check our sub folder on the right. Then click AccountExec button at the top.

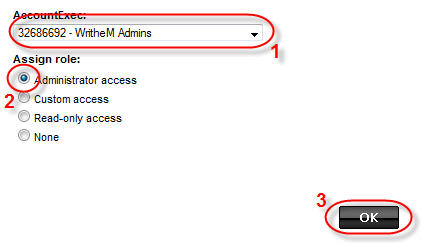
6. Make sure to select us from the Drop down and give us Admin rights to the folder. Then click OK.
Once all of this has been completed, don’t forget to send us an email letting us know that it’s been completed. We can’t admin your domain if we don’t know we have it... Thanks very much for choosing WritheM Web Solutions, and don’t hesitate to ask us for assistance if you need any. You may also open a helpdesk ticket at any time at http://writhem.com/supporttickets.php
